Laravelでログイン機能を作ろう。

- ログイン機能の作り方が知りたい
- 面倒な背景を知らずに実装したい
- Laravelの勉強がしたい
Laravelでログイン機能を作って行きます。
ユーザーがログインして自分だけのデータを扱うというのは多くのアプリで共通したサービスです。そのため、Laravelでは簡単に実装できるように用意してあります。
この記事を読むことでLaravelでのログイン機能が作れます。
Laravelでログイン機能を作ろう。
TwitterやFacebookなどアプリにとってログイン機能は必須と言っても過言でなありません。そのため、Laravelでは簡単に作れるようにコマンドが用意されています。
今回用に新たなプロジェクトを作って行きます。
laravel new loginuiコマンドを使うための準備
ログイン機能を作るためにはいくつかの方法があるのですが、今回はuiというコマンドを使って行きたいと思います。
デフォルトの設定では使えないので作成したプロジェクトに移動し、下記のコマンドを打ち込みます。
cd login
composer require laravel/ui --dev
新たなコマンドが使えるようになったので下記のコマンドで確認します。
php artisanphp artisanで使えるコマンドの一覧が出てきます。
Usage:
  command [options] [arguments]

Options:
  -h, --help            Display this help message
  -q, --quiet           Do not output any message
  -V, --version         Display this application version
      --ansi            Force ANSI output
      --no-ansi         Disable ANSI output
  -n, --no-interaction  Do not ask any interactive question
      --env[=ENV]       The environment the command should run under
  -v|vv|vvv, --verbose  Increase the verbosity of messages: 1 for normal output, 2 for more verbose output and 3 for debug

Available commands:
  clear-compiled       Remove the compiled class file
  down                 Put the application into maintenance mode
  env                  Display the current framework environment
  help                 Displays help for a command
  inspire              Display an inspiring quote
  list                 Lists commands
  migrate              Run the database migrations
  optimize             Cache the framework bootstrap files
  serve                Serve the application on the PHP development server
  test                 Run the application tests
  tinker               Interact with your application
  ui                   Swap the front-end scaffolding for the application //追加された
  up                   Bring the application out of maintenance mode
 auth
  auth:clear-resets    Flush expired password reset tokens
 cache
  cache:clear          Flush the application cache
  cache:forget         Remove an item from the cache
  cache:table          Create a migration for the cache database table
 config
  config:cache         Create a cache file for faster configuration loading
  config:clear         Remove the configuration cache file
 db
  db:seed              Seed the database with records
  db:wipe              Drop all tables, views, and types
 event
  event:cache          Discover and cache the application's events and listeners
  event:clear          Clear all cached events and listeners
  event:generate       Generate the missing events and listeners based on registration
  event:list           List the application's events and listeners
 key
  key:generate         Set the application key
 make
  make:cast            Create a new custom Eloquent cast class
  make:channel         Create a new channel class
  make:command         Create a new Artisan command
  make:component       Create a new view component class
  make:controller      Create a new controller class
  make:event           Create a new event class
  make:exception       Create a new custom exception class
  make:factory         Create a new model factory
  make:job             Create a new job class
  make:listener        Create a new event listener class
  make:mail            Create a new email class
  make:middleware      Create a new middleware class
  make:migration       Create a new migration file
  make:model           Create a new Eloquent model class
  make:notification    Create a new notification class
  make:observer        Create a new observer class
  make:policy          Create a new policy class
  make:provider        Create a new service provider class
  make:request         Create a new form request class
  make:resource        Create a new resource
  make:rule            Create a new validation rule
  make:seeder          Create a new seeder class
  make:test            Create a new test class
 migrate
  migrate:fresh        Drop all tables and re-run all migrations
  migrate:install      Create the migration repository
  migrate:refresh      Reset and re-run all migrations
  migrate:reset        Rollback all database migrations
  migrate:rollback     Rollback the last database migration
  migrate:status       Show the status of each migration
 notifications
  notifications:table  Create a migration for the notifications table
 optimize
  optimize:clear       Remove the cached bootstrap files
 package
  package:discover     Rebuild the cached package manifest
 queue
  queue:failed         List all of the failed queue jobs
  queue:failed-table   Create a migration for the failed queue jobs database table
  queue:flush          Flush all of the failed queue jobs
  queue:forget         Delete a failed queue job
  queue:listen         Listen to a given queue
  queue:restart        Restart queue worker daemons after their current job
  queue:retry          Retry a failed queue job
  queue:table          Create a migration for the queue jobs database table
  queue:work           Start processing jobs on the queue as a daemon
 route
  route:cache          Create a route cache file for faster route registration
  route:clear          Remove the route cache file
  route:list           List all registered routes
 schedule
  schedule:run         Run the scheduled commands
 session
  session:table        Create a migration for the session database table
 storage
  storage:link         Create the symbolic links configured for the application
 stub
  stub:publish         Publish all stubs that are available for customization
 ui //追加された
  ui:auth              Scaffold basic login and registration views and routes
  ui:controllers       Scaffold the authentication controllers
 vendor
  vendor:publish       Publish any publishable assets from vendor packages
 view
  view:cache           Compile all of the application's Blade templates
  view:clear           Clear all compiled view files
これで、uiコマンドが使えるようになりました。追加されたuiというコマンドを使いたいので使い方を確認します。
uiコマンドの使い方
php artisan help uiUsage:
ui [options] [--] <type>
Arguments:
type The preset type (bootstrap, vue, react)
Options:
--auth Install authentication UI scaffolding
--option[=OPTION] Pass an option to the preset command (multiple values allowed)
-h, --help Display this help message
-q, --quiet Do not output any message
-V, --version Display this application version
--ansi Force ANSI output
--no-ansi Disable ANSI output
-n, --no-interaction Do not ask any interactive question
--env[=ENV] The environment the command should run under
-v|vv|vvv, --verbose Increase the verbosity of messages: 1 for normal output, 2 for more verbose output and 3 for debug使い方に書いてある通り、コマンドを打って行きます。
php artisan ui --auth vue

Vue scaffolding installed successfully.
Please run "npm install && npm run dev" to compile your fresh scaffolding.
Authentication scaffolding generated successfully.
メッセージが出ているように下記のコマンドを打って完成です。
npm install && npm run devログイン機能の確認
いろんなファイルが作られたのですが、重要なのは下記のファイルです。
─── login
    ├── resource
        ├── views
            ├── auth
                ├── password
                    ├── confirm.blade.php
                    ├── email.blade.php
                    ├── reset.blade.php
                ├── login.blade.php
                ├── register.blade.php
                ├── verify.blade.php
ログイン機能に必要なviewが作られています。
また、ログイン機能を動かすためのルーティングもすでにできています。(説明するとややこしくなるし、知らなくても使えるので割愛します。)
では、ブラウザで確認して行きましょう。
login.testでアクセスします。
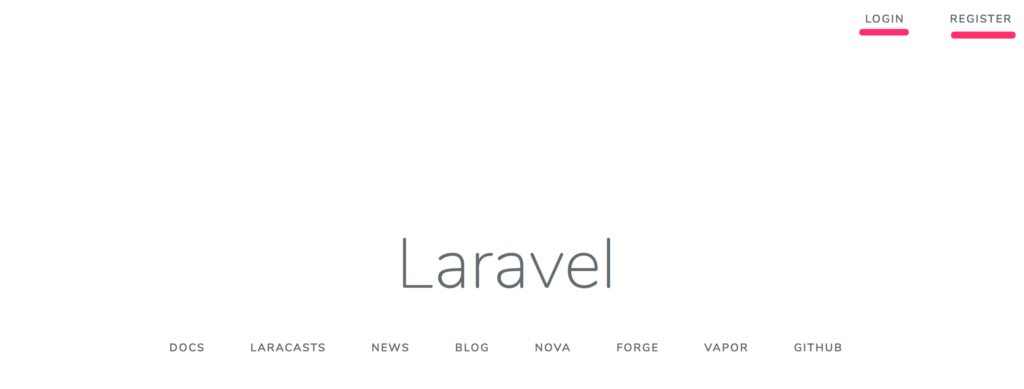
右上にLOGINとREGISTERができてますね。REGISTERをクリックすると下記のような画面になります。
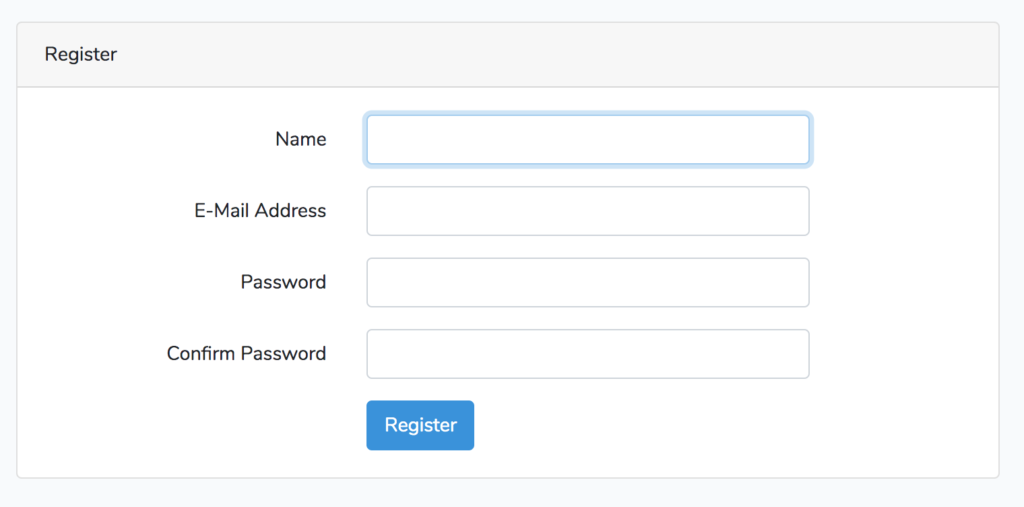
しかし、今のままではデータベースがないので登録できません。
TablePlusからデータベースを作ってやり、.envファイルを編集します。
DB_DATABASE=任意の名前データベースの作り方は過去の記事を参考にしてください。
データベースが作成できたらマイグレーションを行います。
php artisan migrateこれでfailed_jobs、migrations、password_resets、usersテーブルが作られます。
データベースの準備ができたので、ブラウザから登録すればログインできます。うまくいけば下記のような画面になります。
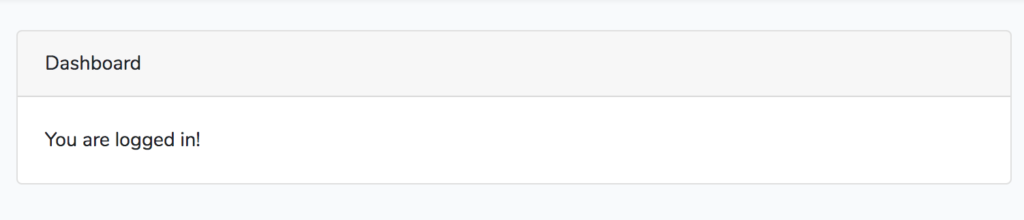
ちなみに、この画面はViewのhome.blade.phpのデータを出力しています。
まとめ
今回はログイン機能の実装を行ってきました。
ログインごの画面を編集していくためにはhome.blade.phpを編集するか、他のファイルを作成してルーティングを変えて行きましょう。
ログイン機能は自分で作るとかなり面倒ですが、uiコマンドを使うことで自動的に作ってくれるので助かりますね。ユーザーの認証なども便利に使えるので感動します。