Laravel中級編④Notificationについて学ぶ
前回はLaravelでのメールの送り方について紹介しました。一部機能が重なるのですが、Notificationという機能もあります。メール機能はメールを送りっぱなしでしたが、Notificationはメールを送った相手に対して何か行動を促して管理することができます。さらに、データベースを使うことで未読、既読の管理も行えます。メール機能が基本となるので、メールってどうやって使うの?という方は前回の記事を見てからにしてください。
- Laravelでメールを実装したい
- MailTrapについて知りたい
- markdownについて基本的な知識がない
Notificationでメールを送る
まずは基本的な使い方を知るためにNotificaitionを使ってメールを送って見ましょう。
Notificationのファイルは下記のコマンドにより作成できます。
php artisan make:notification PaymentReceived「app/Notifications」にPaymentReceived.phpが出来ています。
<?php

namespace App\Notifications;

use Illuminate\Bus\Queueable;
use Illuminate\Contracts\Queue\ShouldQueue;
use Illuminate\Notifications\Messages\MailMessage;
use Illuminate\Notifications\Notification;

class PaymentReceived extends Notification
{
    use Queueable;

    /**
     * Create a new notification instance.
     *
     * @return void
     */
    public function __construct()
    {
        //
    }

    /**
     * Get the notification's delivery channels.
     *
     * @param  mixed  $notifiable
     * @return array
     */
    public function via($notifiable)
    {
        return ['mail'];
    }

    /**
     * Get the mail representation of the notification.
     *
     * @param  mixed  $notifiable
     * @return \Illuminate\Notifications\Messages\MailMessage
     */
    public function toMail($notifiable)
    {
        return (new MailMessage)
                    ->line('The introduction to the notification.')
                    ->action('Notification Action', url('/'))
                    ->line('Thank you for using our application!');
    }

    /**
     * Get the array representation of the notification.
     *
     * @param  mixed  $notifiable
     * @return array
     */
    public function toArray($notifiable)
    {
        return [
            //
        ];
    }
}
色々書いてありますが、メール関連の記載は下記のところです。
public function toMail($notifiable)
    {
        return (new MailMessage)
                    ->line('The introduction to the notification.')
                    ->action('Notification Action', url('/'))
                    ->line('Thank you for using our application!');
    }
どんなメールになっているか後で確認しましょう。
Notificationsを機能させるためにコントローラーを作って行きましょう。
php artisan make:controller PaymentControllerコントローラーはこんな感じです。
ログイン機能を実装しているとuser()が使えます。
use App\Notifications\PaymentReceived;

class PaymentController extends Controller
{
  public function received()
  {
      Notification::send(request()->user(), new PaymentReceived());
  }
}
ルーティングは適当に作りました。
Route::get('/payment', function () {
    return view('Payment');
});
Route::get('/payment/received', 'PaymentController@received');
Viewも最小限にしました。
<a href="{{ url('/payment/received') }}">Payment</a>ブラウザで見てもこんな感じです
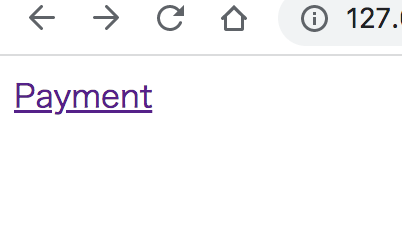
PaymentをクリックするとPaymentController@receivedが発火する、という内容です。
実行
では、実行してメールを確認してみましょう。
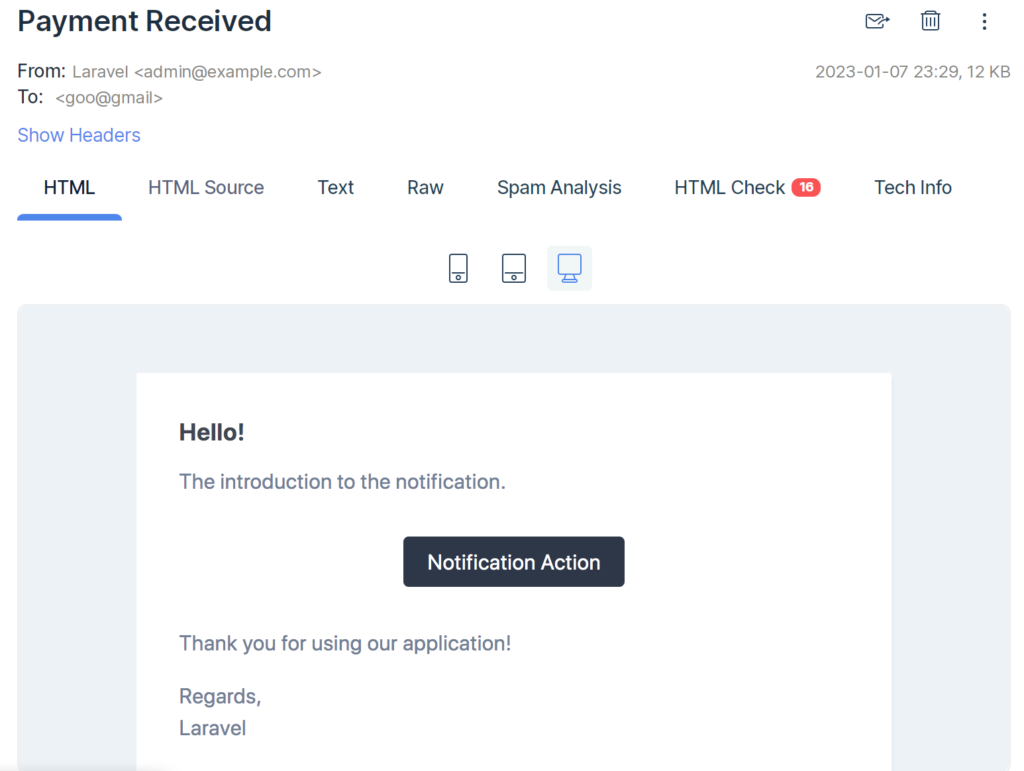
ロゴが表示されるのですが以前の記事で消しました。消したい方はLaravel中級編③を確認してください。このメールがどのように作られているか下記にまとめました。
- タイトルはPaymentReceivedになっています。
- 送信者は.envで設定出来ます。
- 宛先はログインしているユーザーのアドレスになっています。
- Hello! はデフォルトで表示されています。
- PaymentReceived.phpのactionでボタンが作成されています。
- Regards, Thanksもデフォルトで表示されます。
デフォルトで表示されてしまうことが多いですね。メールの内容を変えたいという方も多いと思うので、変える方法をいくつか紹介します。
public function toMail($notifiable)
    {
        return (new MailMessage)
                    ->subject('title') //追加
                    ->greeting('greeting') //追加
                    ->line('The introduction to the notification.')
                    ->action('Notification Action', url('/'))
                    ->line('Thank you for using our application!');
                    ->salutation('Thank you'); //追加
    }
さらに、コントローラーの書き方も簡潔に出来ます。
public function received()
  {
      request()->user()->notify(new PaymentReceived());
      // Notification::send(request()->user(), new PaymentReceived());
  }
では、もう一度実行して追加したところがどのように表示されるか確認してみます。
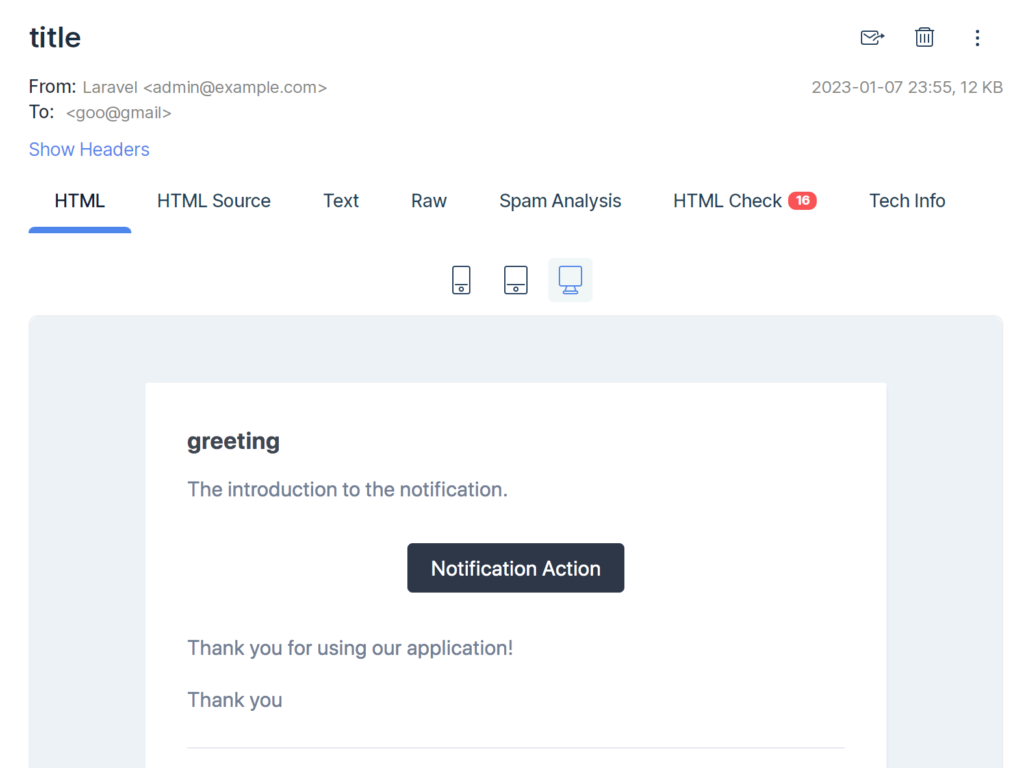
タイトルや1行目、最後の行とデフォルト設定だったものが変わっているのがわかります。
Databaseを使う
Notificationにはdatabaseにデータを送信する機能もあります。
既読機能など便利な機能が実装できるので紹介します。
php artisan notifications:table
php artisan migrate
エラー「Class ‘Facade\Ignition\IgnitionServiceProvider’ not found」が出た時はコンポーザーをアップデートしましょう。
composer updateマイグレーションができたらどんなテーブルができたか確認しましょう。
TablePlusから確認するのが便利ですが、説明しづらいのでテーブル作成に使ったファイルを見てみます。
public function up()
    {
        Schema::create('notifications', function (Blueprint $table) {
            $table->uuid('id')->primary();
            $table->string('type');
            $table->morphs('notifiable');
            $table->text('data');
            $table->timestamp('read_at')->nullable();
            $table->timestamps();
        });
    }
何に使う項目かよくわからないですね。とりあえず、動かしてみます。
まずはNotificationを編集して行きます。
class PaymentReceived extends Notification
{
    use Queueable;
    protected $amount; // 追加

    /**
     * Create a new notification instance.
     *
     * @return void
     */
    public function __construct($amount)
    {
        $this->amount = $amount; // 追加
    }

    /**
     * Get the notification's delivery channels.
     *
     * @param  mixed  $notifiable
     * @return array
     */
    public function via($notifiable)
    {
        return ['mail', 'database']; // database追加
    }

    /**
     * Get the mail representation of the notification.
     *
     * @param  mixed  $notifiable
     * @return \Illuminate\Notifications\Messages\MailMessage
     */
    public function toMail($notifiable)
    {
        return (new MailMessage)
                    ->subject('title')
                    ->greeting('greeting')
                    ->line('The introduction to the notification.')
                    ->action('Notification Action', url('/'))
                    ->line('Thank you for using our application!')
                    ->salutation('Thank you');
    }

    /**
     * Get the array representation of the notification.
     *
     * @param  mixed  $notifiable
     * @return array
     */
    public function toArray($notifiable)
    {
        return [
            'amount' => $this->amount // 追加(toArrayと同じ処理)
        ];
    }
}
コントローラーも編集します。
public function received()
  {
      request()->user()->notify(new PaymentReceived(900)); //900を追加
  }
Notificationの$amountに900を渡すようにしました。
実行
では、実行してデータベースを確認します。
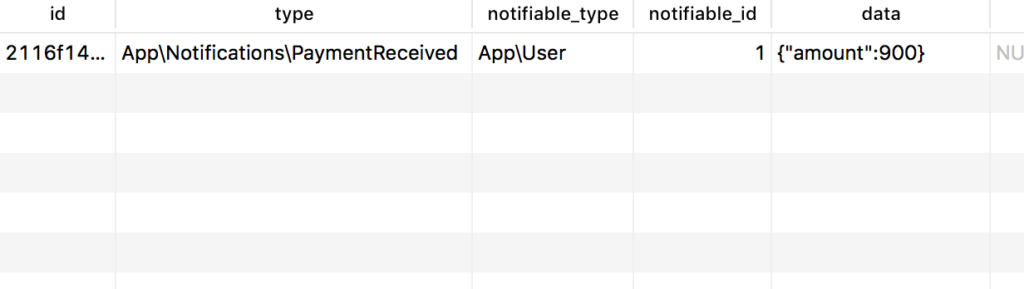
それぞれのデータが何を示しているのか簡単にまとめます。
- typeにはnotificationの種類が入っています。
- notifiable_typeにはモデルデータのタイプが入っています。
- notifiable_idにはユーザーのidが入っています。
- dataにはtoArrayの内容が入っています。
これらを有効活用して行きましょう。
コントローラーを編集します。
public function received()
  {
      request()->user()->notify(new PaymentReceived(900));

      $notifications = auth()->user()->unreadnotifications;

      $notifications->markAsRead();
    //上記の内容と同じ
      // foreach($notifications as $notification){
      //   $notification->markAsRead();
      // }

      return view('PaymentReceived', compact('notifications'));
  }
・PaymentReceivedを呼び出しつつ、Notificationを既読処理しています。
・unreadnotificationの代わりにnotificationを使うと既読したものも抽出できます。
・未読のものをViewに渡しているのViewで見れるように書いて行きます。
<div>
  <ul>
    @foreach($notifications as $notification)
      @if($notification->type == 'App\Notifications\PaymentReceived')
        <li>{{$notification->data['amount']}}の支払いが完了しました</li>
      @endif
    @endforeach
  </ul>
</div>
こんな感じにしました。
実行
では、確認して行きます。

ブラウザはうまく表示されています。
データベースも確認します。

2つ目が増えてますね。
ブラウザに表示されたのは一つなのでうまくいってますね。
read_atも空白では無くなっています。
この機能を使うとチャットで既読機能を実装することもできます。また、ユーザーに対して何が新しいお知らせかを知らせることもできてかなり便利です。
メール以外にもSMSやSlackなどを使うことも可能なようなので、いつか機会があれば紹介したいと思います。